This tutorial shows how to integrate cVEP paradigm with Unity to make a mind-controlled game like in the videos below.
What you need:
OpenBCI board (Ganglion Board or Cyton Board)
EEG Headband or cap
cVEP app (developed by Jason Farquhar for MindAffect)
EEG electrodes + cables
1. OpenBCI, cVEP and Headband configuration
For OpenBCI and cVEP configuration, follow steps 1 to 3 at this link.
2. Unity and cVEP integration
After a successful Unity Hub installation (instruction here) go to cVEP-Unity repo at this link and clone the project.
At this point you have three options:
1. Experiment with samples from repo (go to step 3)
2. Clone a repo with a mind-control game from the videos above (go to step 4)
3. Create your own game (go to step 5)
3. cVEP game samples
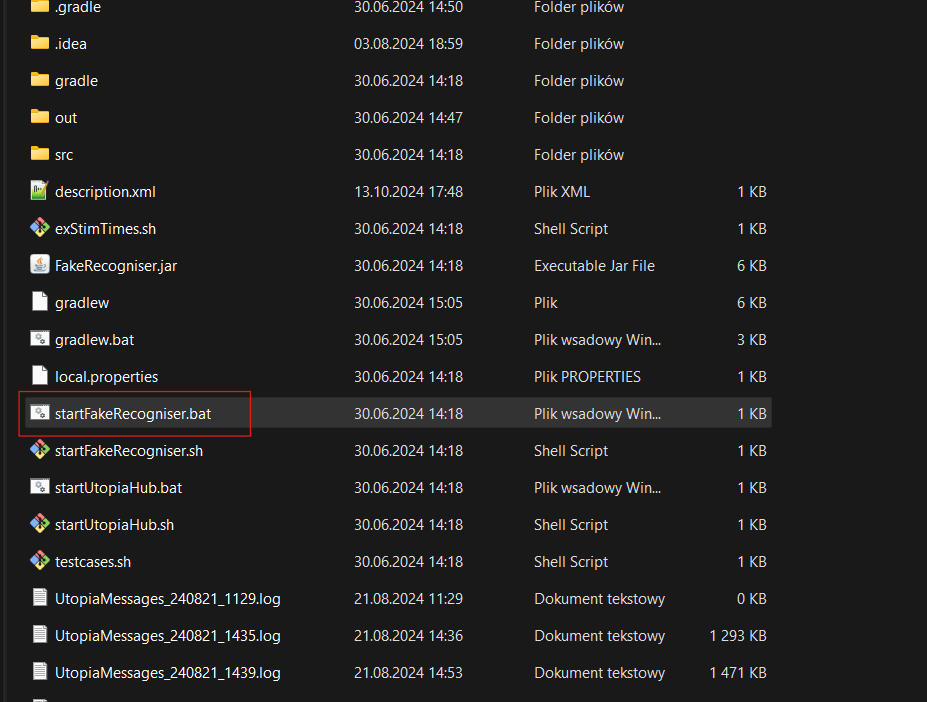
After cloning a project from cVEP repo you should have three folders in a repository directory:

fake_recogniser – contains a recogniser that you can use for testing without a connection with BCI. Just remember to run startFakeRecogniser.bat before running a Unity project.
Folders fpsshooter and minimal_presentation contain sample projects that you can open in Unity. Open Unity Hub and add a project:

After adding a project you should be able to run a game (fpsshooter from a repo directory in the case below):

If you are not using a fake recogniser please make sure to run cVEP app and perform a calibration before running a game. Instruction here
4. FPS with a mind-control configuration
Clone a repo from this link. Open Unity Hub and add a project.
Before running a game please make sure you have OpenBCI, cVEP app configuration and Headband with EEG electrodes. If not follow steps at this link. And remember about Calibration!
You can also use a fake recogniser in cVEP app if you dont want to use a connected BCI:
After adding a project to Unity Hub and BCI configuration (OpenBCI board, cVEP app calibration) you should be able to run the game:

Game controls:
W, A, S, D – Forward, Left, Backward, Right
Space – Jump (Double press for double jump)
Mouse Left Click – Fire
Please be aware that I am developing this game and there might be frequent updates.
It is still an early stage – a proof of concept.
5. Unity + cVEP integration
If you successfully followed steps 1 to 3 from this tutorial clone a cVEP repo from this link.
Create a new project in Unity Hub:

Go to cVEP Unity repo directory fpsshooter and copy:
Assets\FPS\Scripts\Noisetag
Assets\FPS\Scripts\NoisetagBehaviour.cs
Assets\FPS\Scripts\NoisetagController.cs
and paste to your Unity project Assets/Scripts folder.
Create a new script (you can name it ‘StartNoisetagFlicker’) in your Assets/Scripts directory and add this line to your Start() function (you can change a value 50, it is a max number of predictions):
NoisetagController.Instance.startPrediction(50);

If you run a game in Unity and you get this error

go to Noisetag.cs and in line 841 make sure you have a correct path

In the next step add an empty GameObject in the scene (right click -> Create Empty) and you can name it as you wish (in my case NoiseTagConfig).

Click on it and go to inspector on the right side of a screen and add two components: NoisetagController and StartNoisetagFlicker (that you previously created)

Expand the NoisetagController and add a codebook file from your Assets/Scripts/Noisetag folder:

For a testing purpose to verify if cVEP app works in Unity create an empty GameObject in the scene for example a Sphere.

And add a new component with a script NoisetagBehaviour in the inspector window.
Drag Main Camera from the Scene (a window on the left side of the screen) and drop it on Cam Object.
Click on + in the Selected Event field and drag and drop Mesh Renderer and select MeshRenderer.enabled function

When you run the game a sphere should be flickering until the recogniser responds. If it disappears it means that the recogniser responded, event was triggered and the function disabled the sphere.
I hope these instructions were helpful.
Good luck with your experiments!
Pyotr
Hi Pyotr,
This is an amazing write up! I am attempting to recreate this.
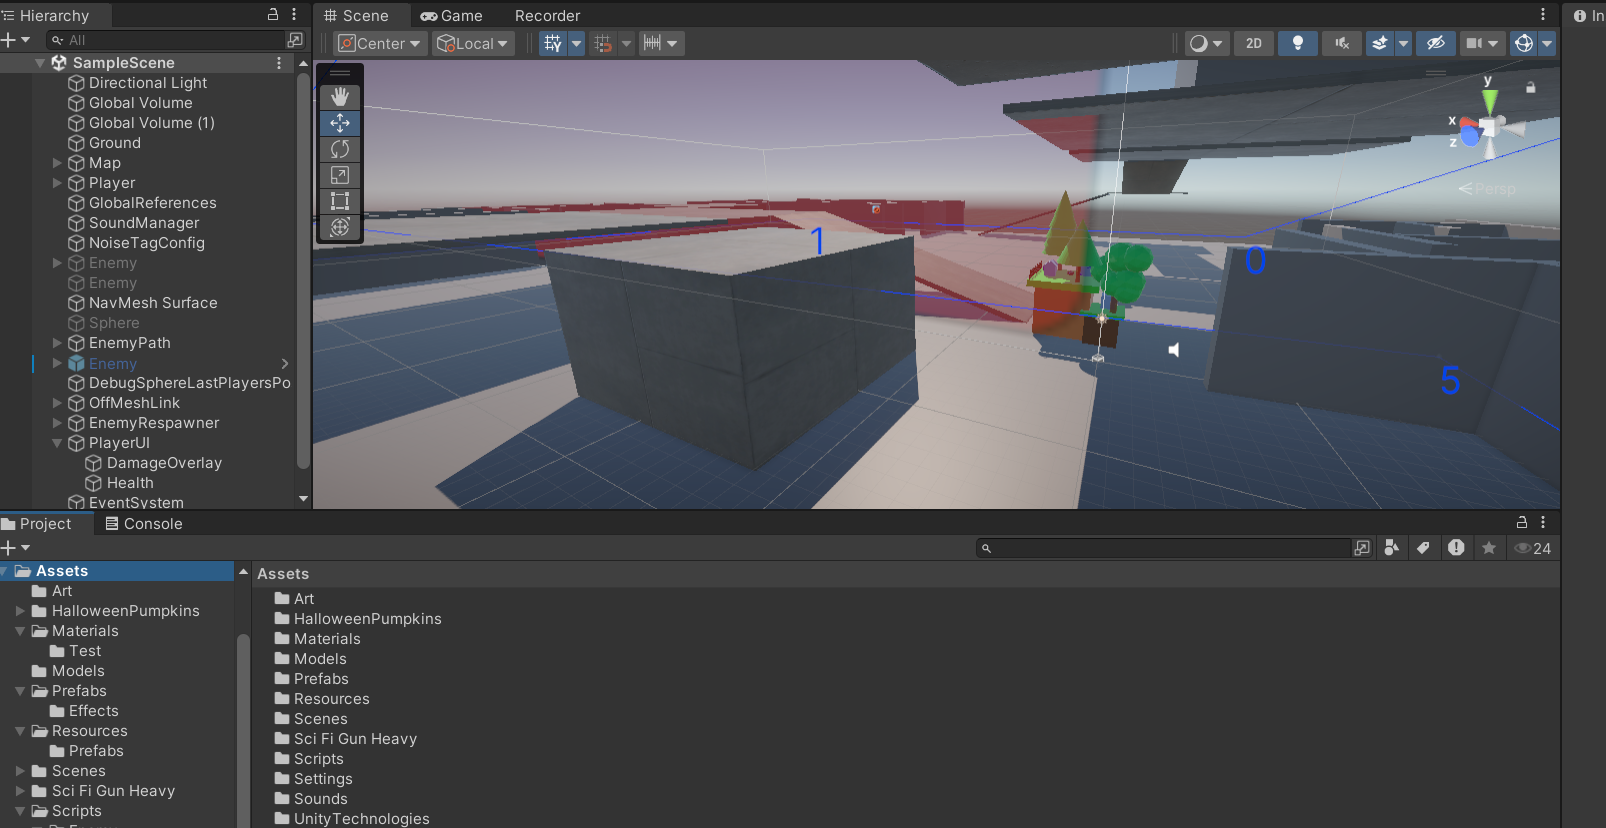
I am currently trying to follow step 4 (FPS with a mind-control configuration) with your fps_mind_controlled repo and am having issues running it on Unity with the fake recogniser bat file (I am a unity noobie). Essentially, when I click play on the samplescene, I simply see a gun and am able to move around, but I do not see the robots/spheres that should be popping up (as the fake recognizer file is running). Do you know what I could have missed? Is running the samplescene not what I should be clicking on to start the game?
Hi bro, thanks for kind words.
Oof this will be hard to troubleshoot If you are not familiar with Unity. I dont know at which state you cloned the repo as it was updated a lot since the FPS concept. You could share me some screenshots from your Unity window. If you see the gun and you can walk around then most likely its just a matter of enabling enemies or some other disabled parameter.
You can share me some screenshots on google drive for example. I will try to help
P.