In this tutorial, I will walk through a complete tutorial for creating a brain-controlled exoskeleton arm with two degrees of motion. I will first explain the Brain-Computer Interface (BCI) side of the system.
In this prototype, the system works by classifying whether the user is in a more focused or relaxed state. Based on this detected state, a signal is sent from the BCI setup to the arm control system, which then performs a movement. For this version, a focused state can be used to close the arm, while a relaxed or non-focused state can be used to open it.
To simplify the setup, this tutorial uses the focus widget already available in the OpenBCI GUI. Instead of directly extracting the EEG focus value from the backend, the current system reads the color shown by the focus widget on the screen. This makes the method easier to prototype, although it is still a workaround rather than a fully integrated signal-processing pipeline. However, if you wish to extract the EEG focus values within the programming phase, you can utilize the Brain Flow library, which has very useful functions that do these calculations automatically.
Please find the code for this setup in the attached GitHub repository under the file named “state_detector.py”. This file uses a Python library called tkinter, which can detect the HEX color value at a selected screen location. Since the OpenBCI focus widget changes color depending on the detected state, the script places the cursor over that widget and continuously reads the color being displayed. In this setup, the widget uses blue and green, with the respective HEX codes #3f67a0 and #c0db79. By tracking which color is currently shown, the program can determine whether the user is detected as focused or relaxed.
Please refer to the image below for the OpenBCI GUI focus widget.
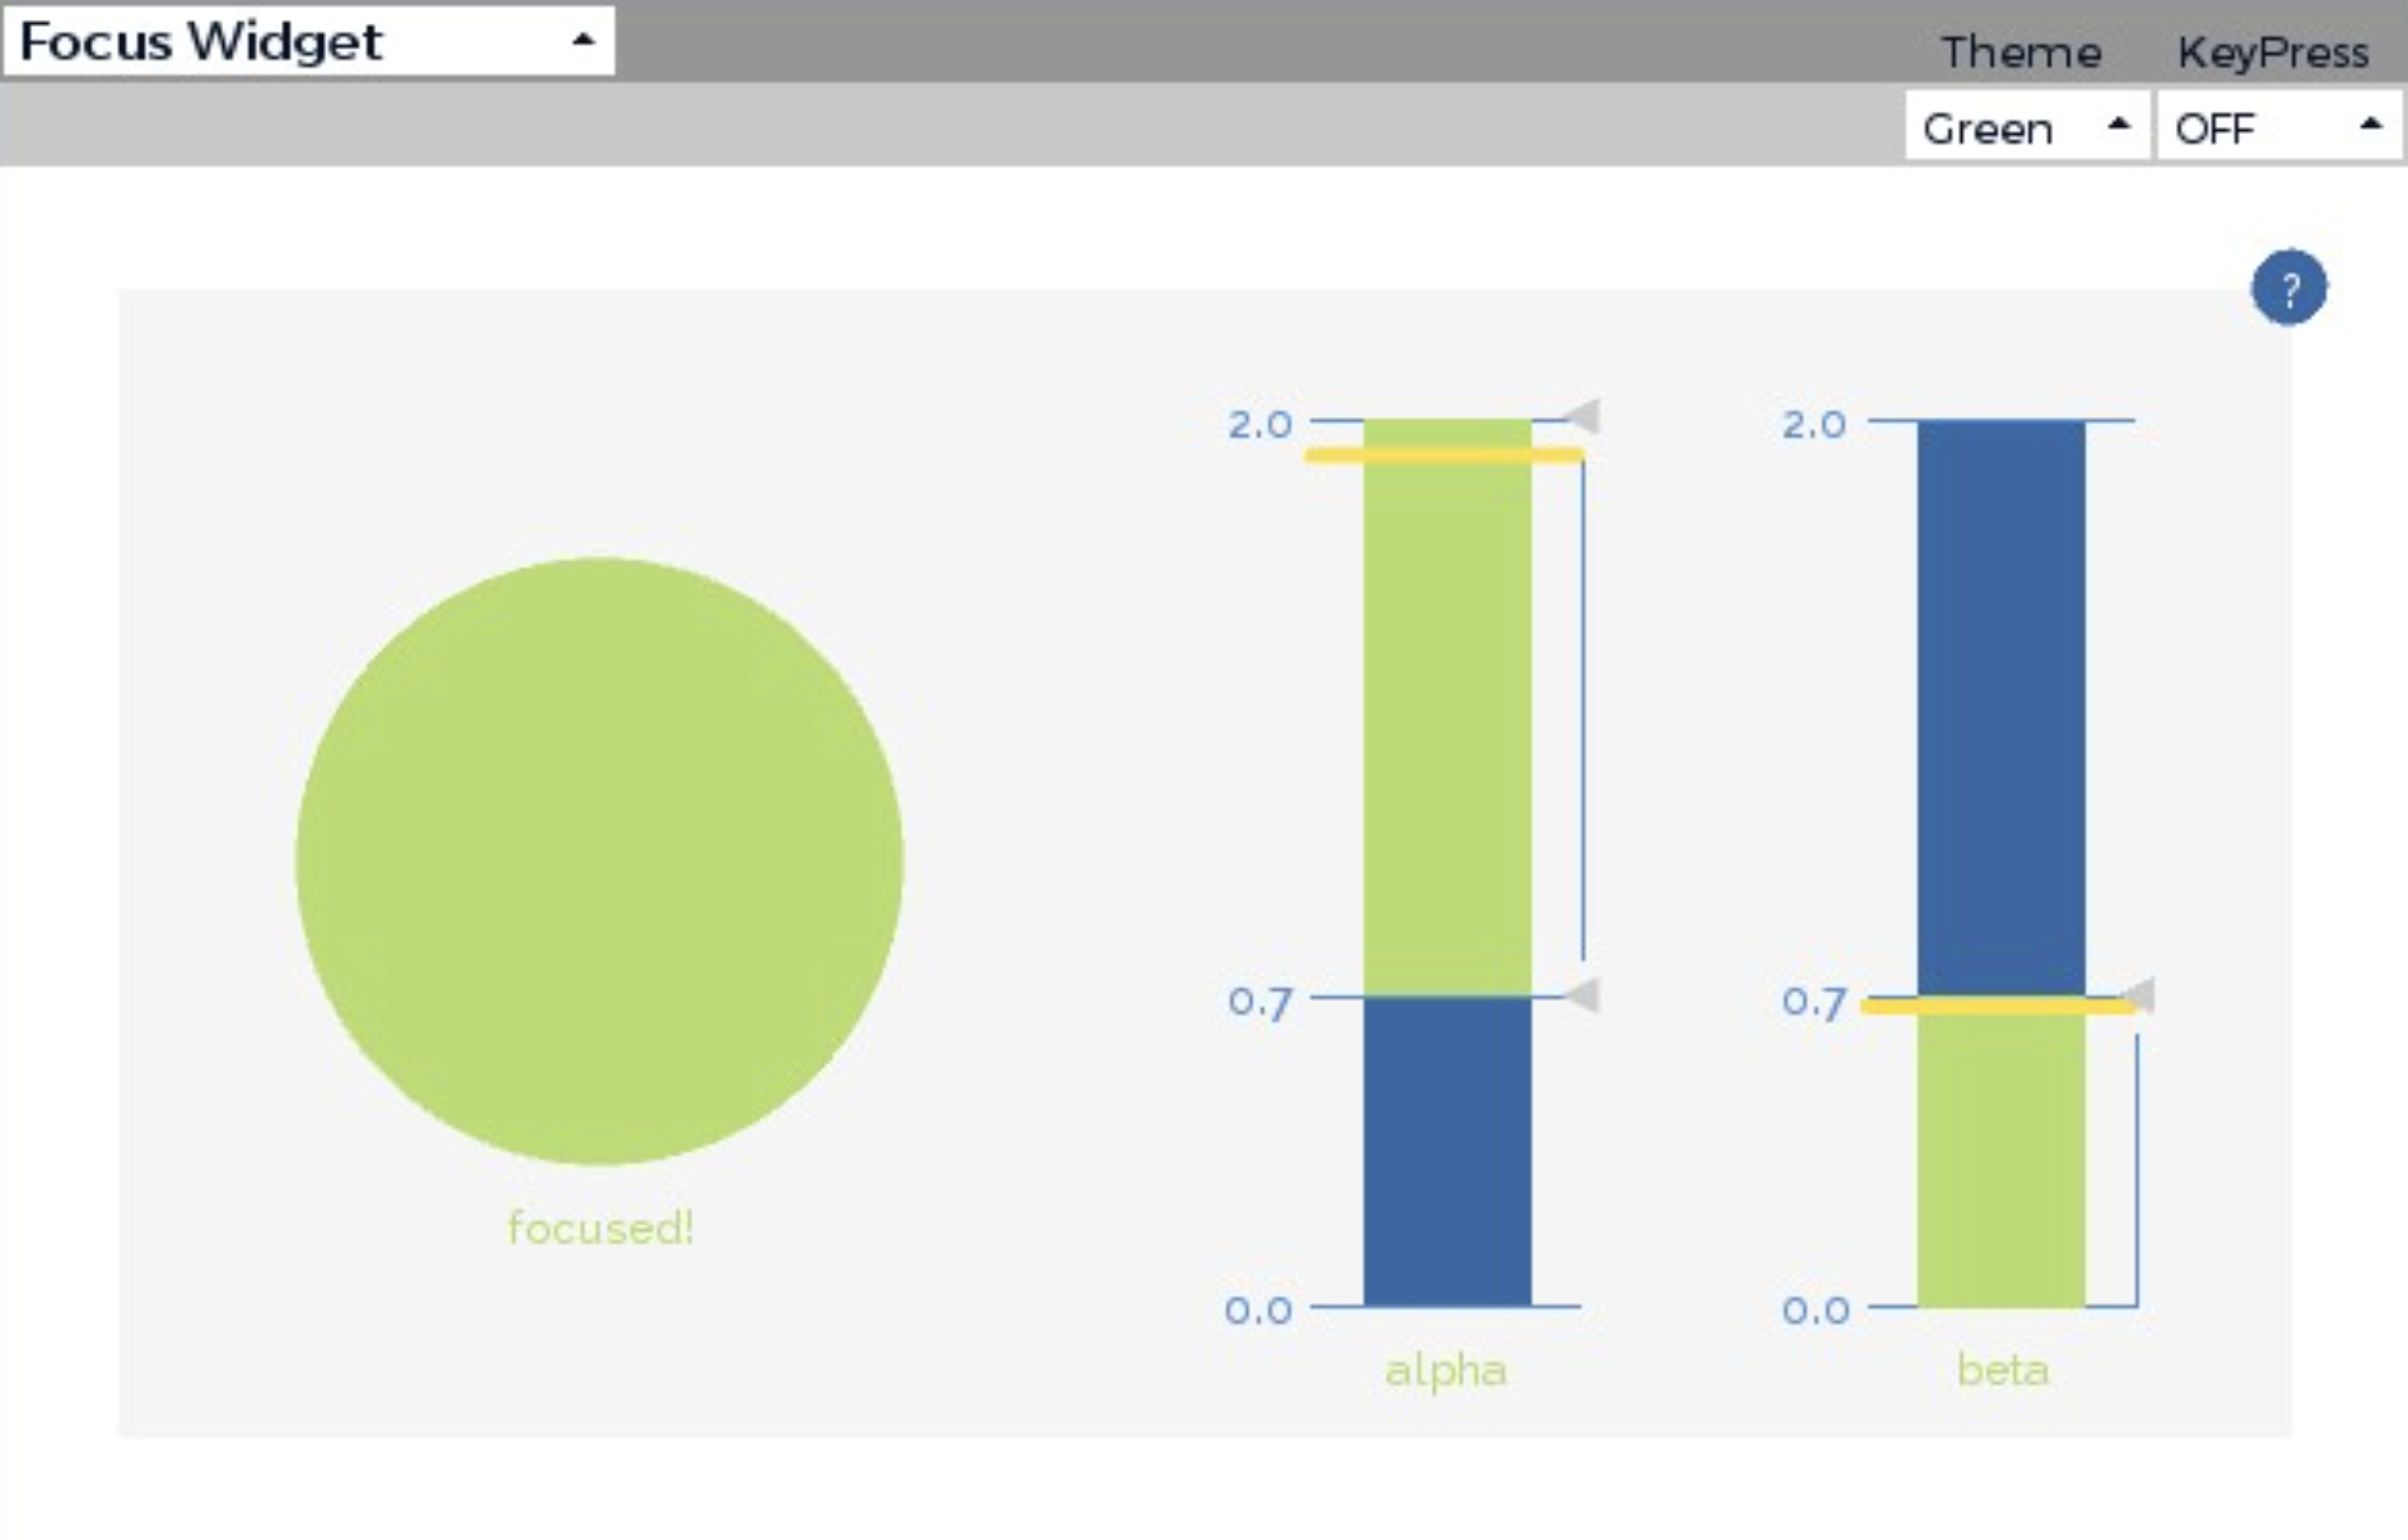
A quick note: the focus feature in OpenBCI is based on EEG activity, commonly using relationships between alpha and beta brainwave bands. In general, higher beta activity relative to alpha is more often associated with concentration or alert focus, while higher alpha activity relative to beta is more often associated with a more relaxed mental state. However, this should still be treated as an estimate rather than a perfect measurement of attention.
Exoskeleton Arm Creation
Now that the BCI system is complete, let’s work on the mechanical aspect, where we build the exoskeleton arm. The exoskeleton needs to have five controllable fingers, so I decided to thread a thick string through each finger. Later, these strings will be controlled by an MG995R positional servo motor, using a Tendon-Driven Actuation System. I started creating the robotic arm by 3D printing all the required components. This meant designing it in CAD(Fusion 360) and printing it on a printer(Adventurer 5M Pro). The arm was modified such that it included the exact measurements of my own fingers and arm.
I have attached a folder under the GitHub directory called 3D Printable Files (STL). If you have access to a 3D printer, then you can immediately print out the files; otherwise, please make sure that you have access to such a device so that you can carry out the project. Moreover, before sending it to the printer, remember to slice the file according to the printer specifications. The following images document the 3D printing process for my project.

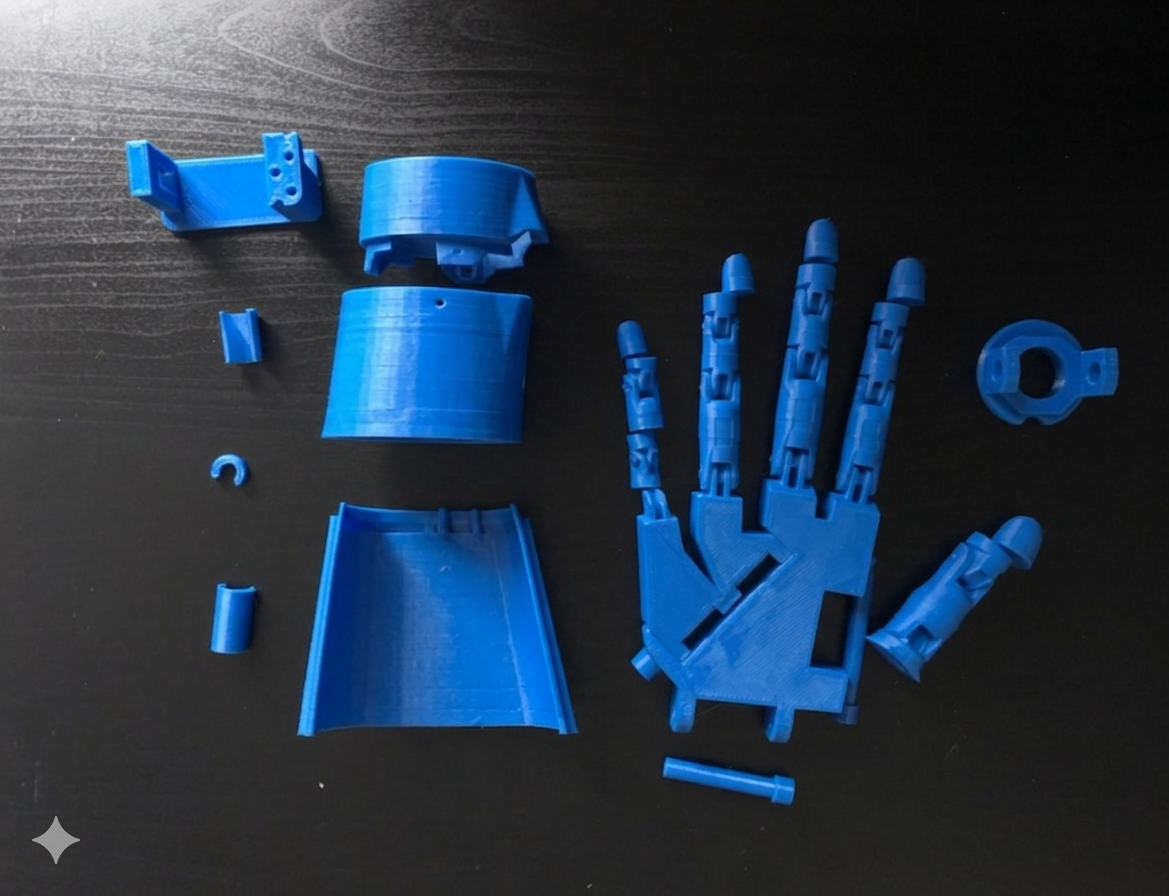
Upon completing the 3D printing aspect of the project, I was required to assemble the hand. This required a lot of UHU Adhesive Glue! After this stage, I worked on threading the strings through all the holes, making sure it was correctly placed and that it wouldn’t cause issues in the future.

After assembling the arm, I needed to focus on the hardware controls. This involved properly attaching horns to the motors, as the strings would be wrapped and screwed around them for control. This is an image of the Servo Motors all set up with the Arduino(needed for the power supply), Breadboard(easier for wiring organisation), and the Servo Tester(the main -temporary- control of the arm)!

Check out the completed Arm through this GIF and other pictures:


Now that both systems are completed, let’s run the script properly as one pipeline. To do so, please follow these steps:
- Open the OpenBCI GUI on your computer and keep the focus widget clearly visible, ideally in split-screen mode.
- Run the script using
python3 main.py. - The script will give you the first 3 seconds to select the OpenBCI GUI, so quickly move your cursor to the focus widget area.
- In parallel, make sure you also run the
sender.pyandreceiver.pyscript.
The second script referenced above is responsible for sending the open or close command over the network using IP communication. Since the exoskeleton arm is controlled by a Raspberry Pi, a corresponding receiving script must also be running on the Raspberry Pi. This script listens for the incoming signal and then triggers the arm movement. The code for this Raspberry Pi script is titled receiver.py in the GitHub repository.
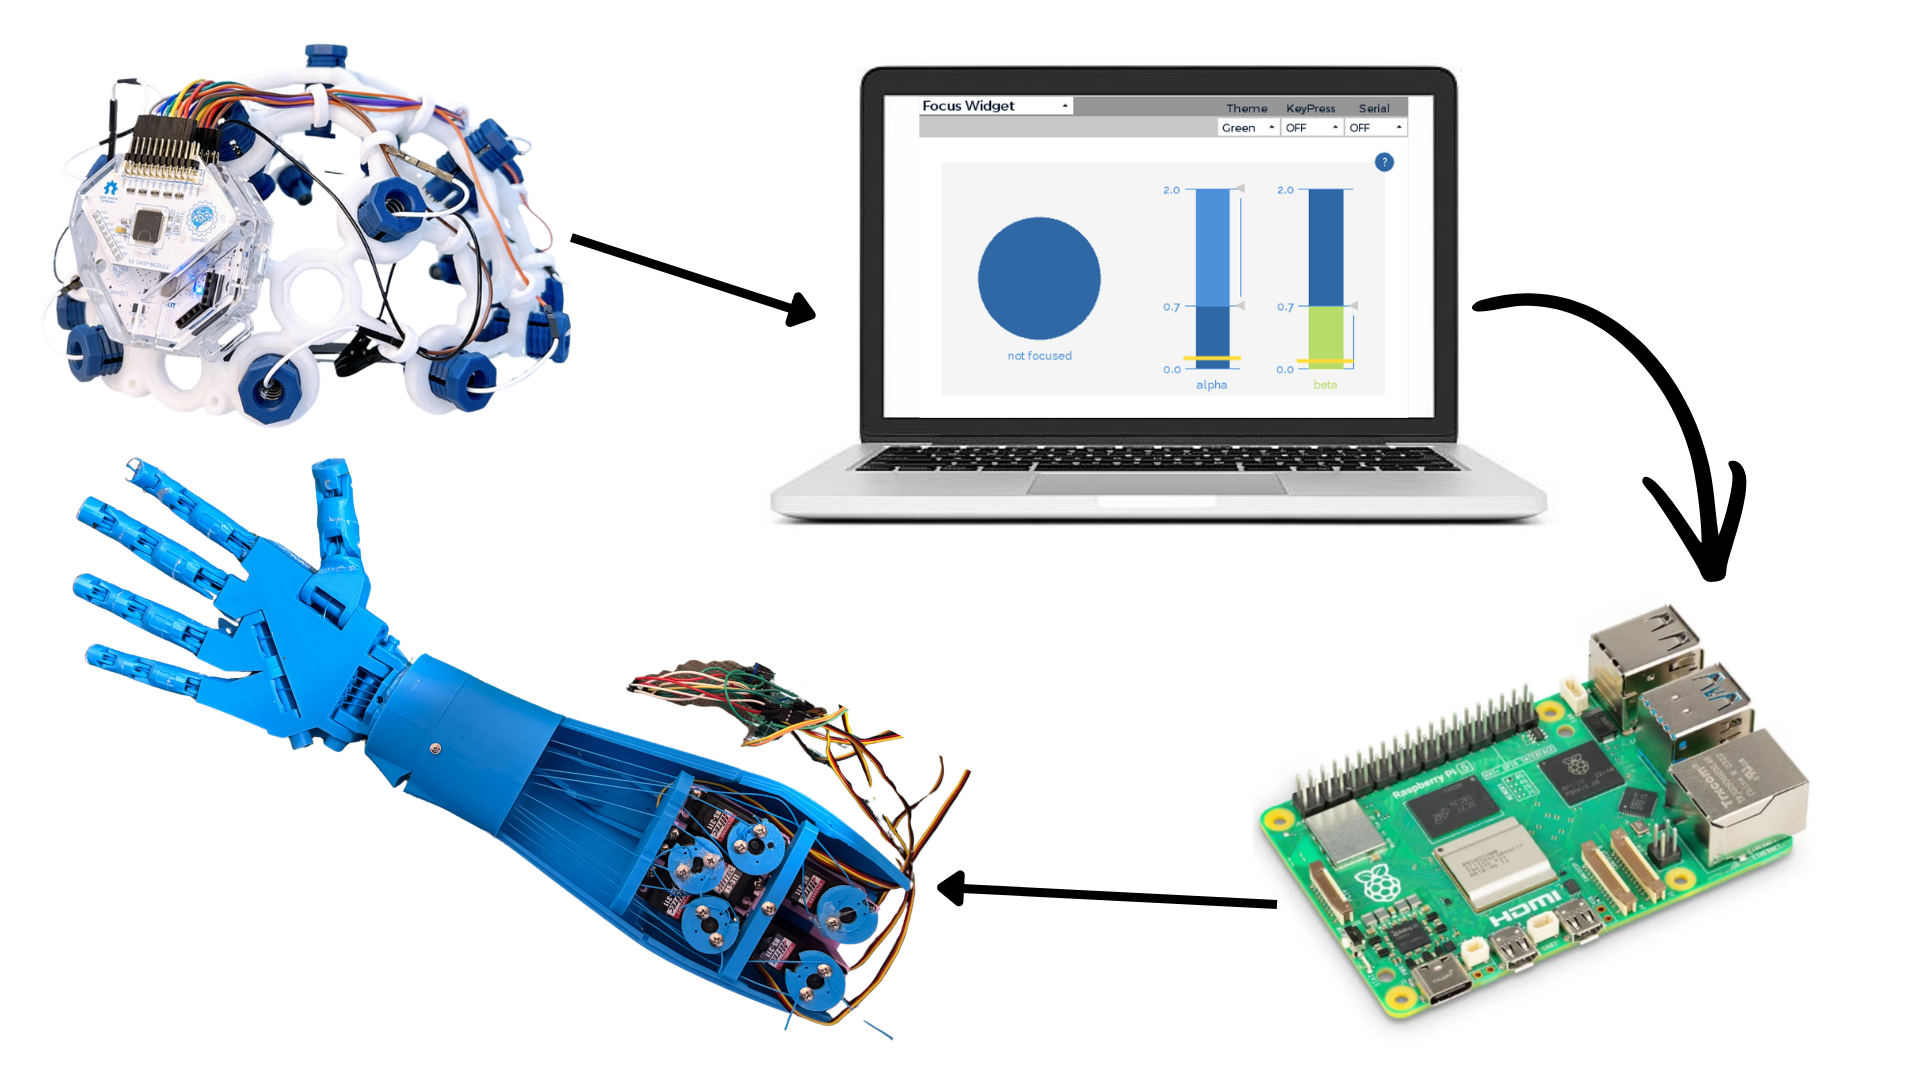
Overall, the full system works as follows:
OpenBCI headset → OpenBCI GUI focus widget → Python color-detection script → IP signal sent to Raspberry Pi → exoskeleton arm movement
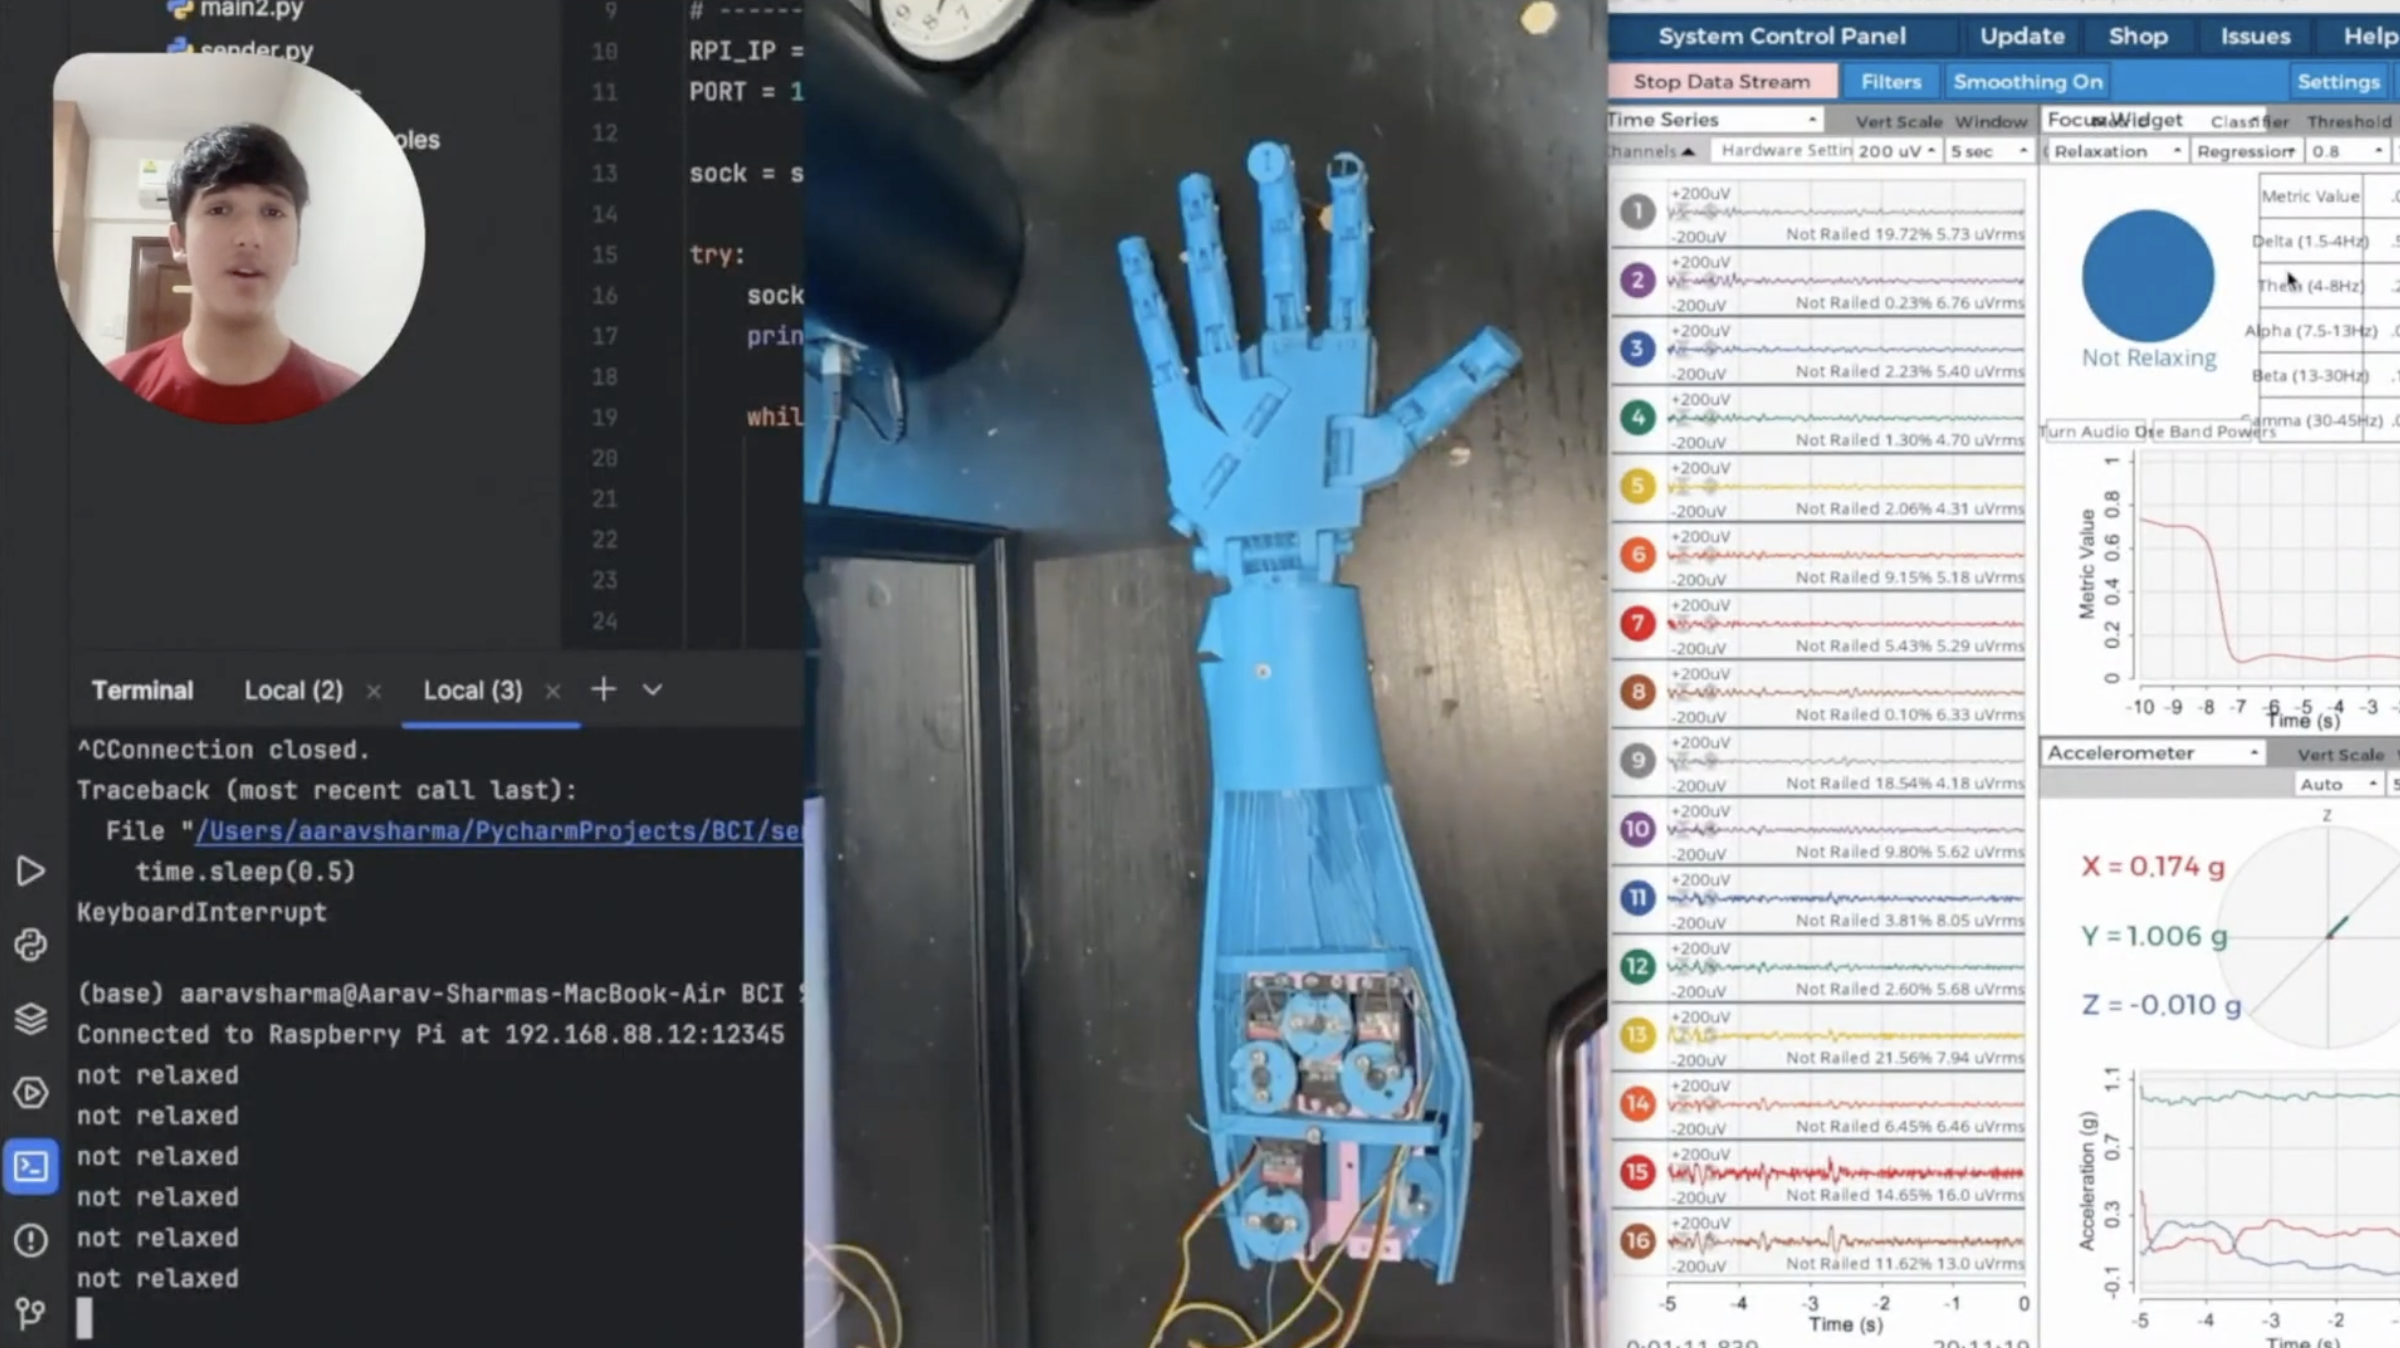
Feel free to view a video attached here to see my system working in real time.
Email for contact: aaravsharma23 [at] gmail [dot] com
Leave a Reply
You must be logged in to post a comment.