Recently, I got an email from Chris, the primary developer behind BrainBay. He had seen my earlier post, where I’d found a way to get OpenBCI to send data to BrainBay for live visualization and processing. I was able to make it work by forcing OpenBCI to mimic the data format used by OpenEEG. Since OpenBCI is more capable than OpenEEG (OpenBCI has more channels and higher bit depth), fitting myself into the OpenEEG format was not an optimal solution. Well, Chris saw an opportunity to remedy the situation, so he wrote an OpenBCI-specific driver for BrainBay. Now, OpenBCI can send all 8 channels of data in full resolution to BrainBay! Thanks, Chris!
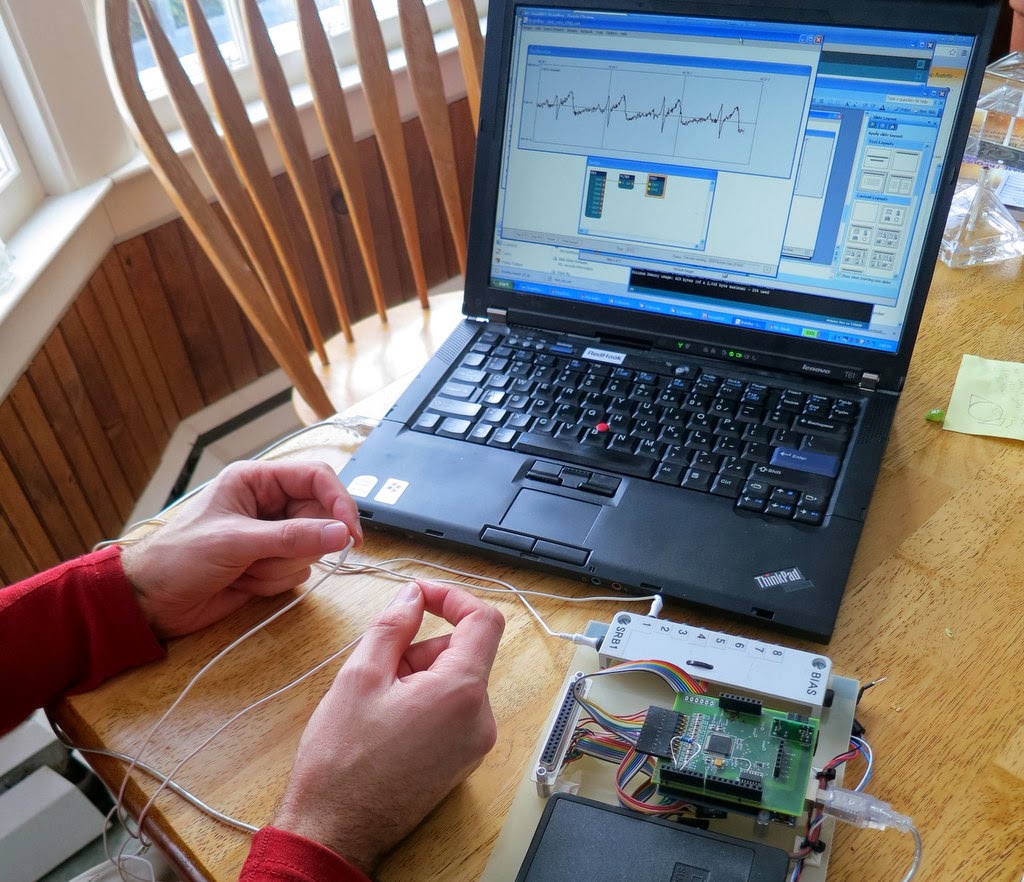 |
| Recording my ECG into BrainBay Using the new OpenBCI-Specific Driver. I’m holding the electrodes between my fingers. |
Below is a screen shot of the BrainBay hardware setup screen using the new OpenBCI driver. It’s pretty straight-forward…select the COM port and select the baud rate for the communication and you’re done.
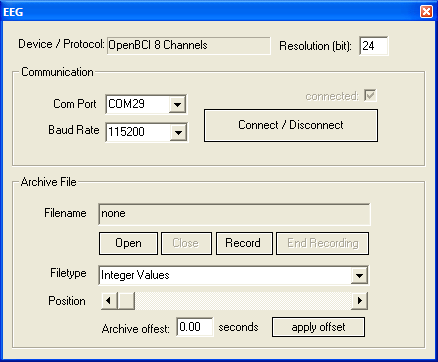 |
| Setup Screen in BrainBay for the New OpenBCI Driver |
Right now the driver assumes that you are using a 250 Hz sample rate (which is what OpenBCI’s Arduino software defaults to), but if you tell OpenBCI to run faster, BrainBay lets you change that. Simply go to BrainBay’s “Options” menu and select “Application Settings”. There, you can change the sample rate to however you’ve configured your OpenBCI board.
Once Chris made this OpenBCI driver, we had to test it out to make sure that it worked. Since Chris didn’t have an OpenBCI board, he couldn’t test it himself. So, he’d point me to his GitHub, I’d download his latest version of BrainBay, and I’d test it for him. An important part of testing is doing things repeatably. So, I added a mode to the OpenBCI software where it would output simple test waveforms instead of the real EEG data. (It is true that the ADS1299 has a bunch of test signals built-in, but none let you do different waveforms per channel. That’s what I coded up for OpenBCI.)
Below is a screen shot of BrainBay after we got the OpenBCI driver all debugged. The synthetic test waveforms that were being output by OpenBCI are the simple ramp waves shown below. Once we finally got it to look like this, I was so happy!
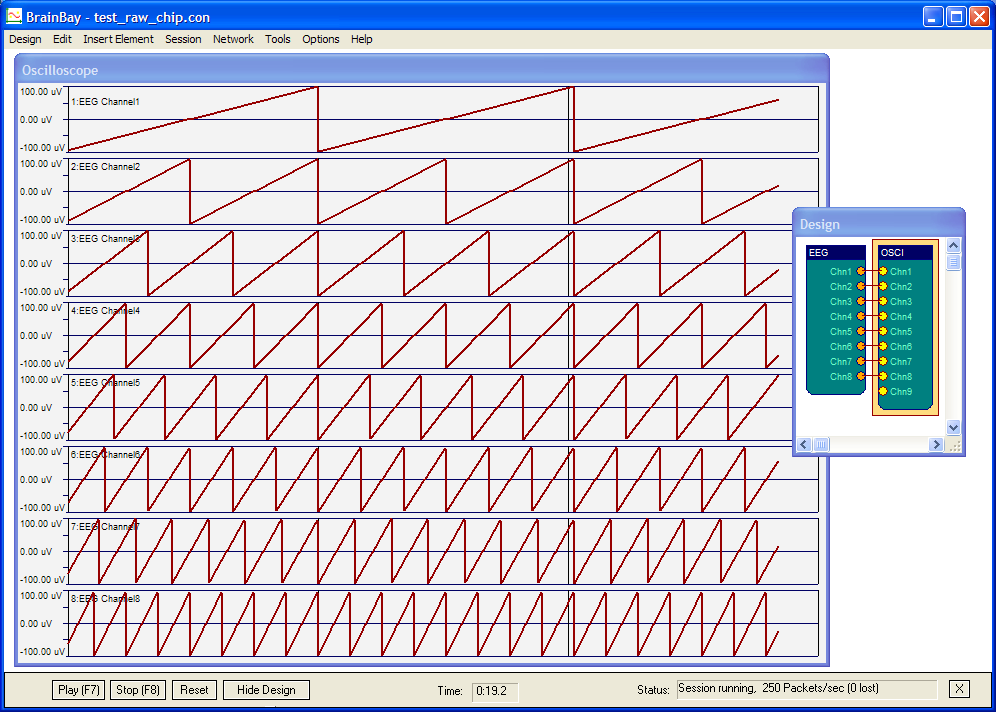 |
| Confirming Correct Operation in BrainBay via Synthetically Generated Data from My OpenBCI Board. |
With basic operation confirmed, I wanted to test it with real biosignals. So, I did what I always do as my first test…ECG. As seen in the picture at the beginning of this post, I used a couple of really basic electrodes connected to an OpenBCI V1 board. To get my ECG, I simply held those basic between by finger tips (I licked my finger tips to increase their conductivity). Generally, this is a really bad way to do an ECG…the muscle artifact from actively holding the electrodes can swamp your signal. But, with a very light tough, it can be good enough to prove that that the system is working. And it was working. A screen shot of my ECG is shown below. This is a pretty decent looking ECG trace…it’s got a nice little P-wave, a sharp R-wave, and a nice rounded T-wave. Very fine.
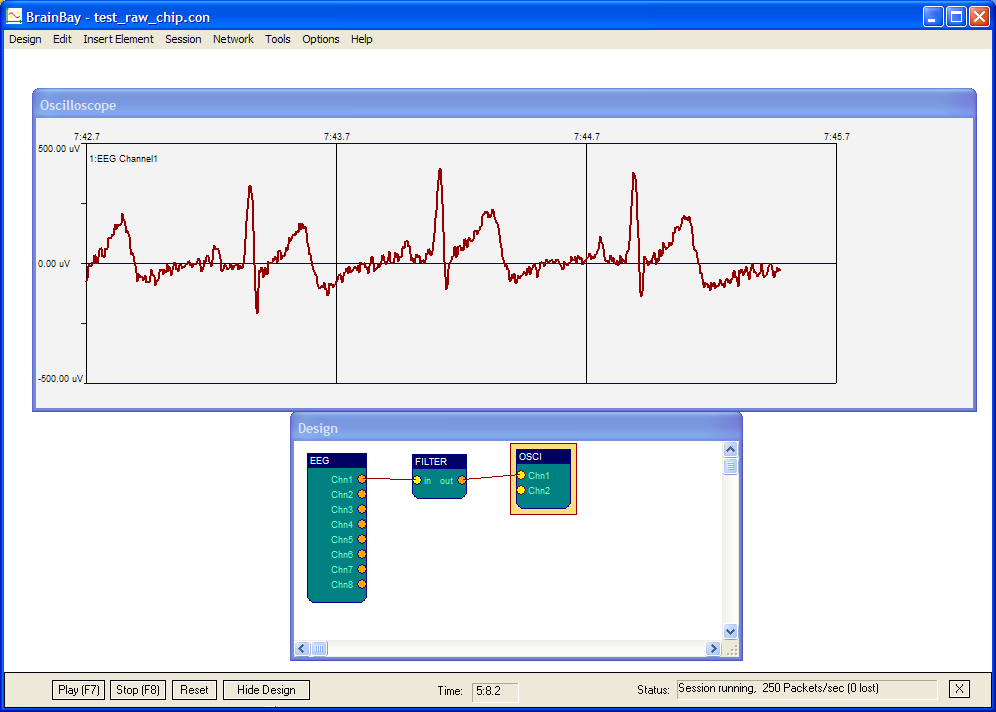 |
| Recording my ECG From OpenBCI Using the New Driver in BrainBay. Looks good! |
So, unlike my previous time posting about BrainBay, this latest recording is all at OpenBCI’s native capabilities. There was no dumbing it down to fit within OpenEEG’s data format. With Chris’ latest version of BrainBay, you can now use all 8-channels that OpenBCI generates at OpenBCI’s full 24-bit resolution.
Latest BrainBay on GitHub: https://github.com/ChrisVeigl/BrainBay
Thanks, Chris!